GESS Indonesia 2016

fullsizerender-4

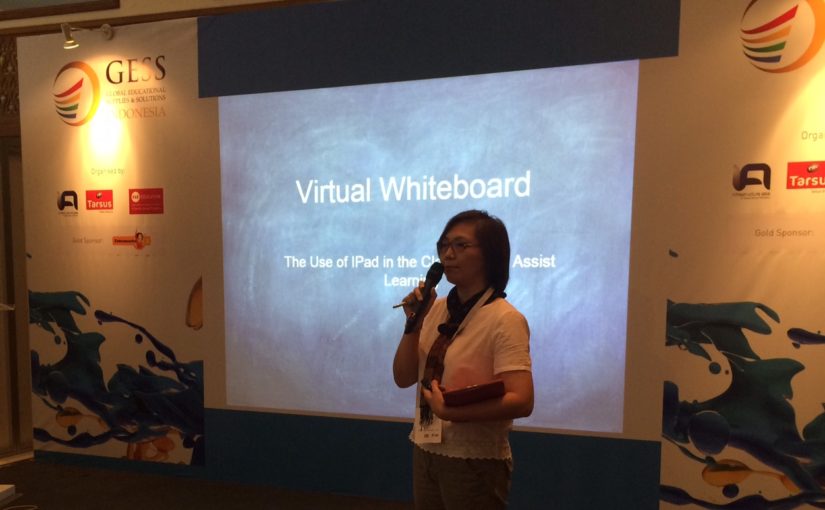
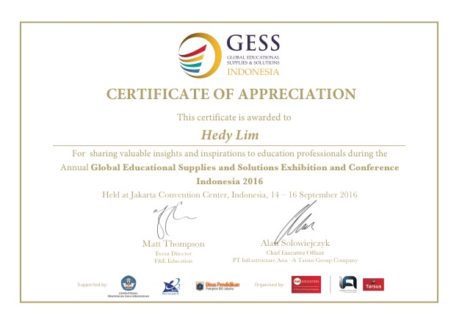
This year, I had opportunity to join in GESS Conference as one of the speaker. Or better saying as a person who willing to share his / her idea or experience on their journey of teaching (If the person is a teacher, like me 🙂 ).

I shared the use of IPad in the classroom to assist learning. I have been using it for several years.

Use your IPad (tablet) as a mobile interactive whiteboard and enjoy a completely untethered teaching experience. Focus on your class and not the whiteboard. Embed rich media elements like graphics, images and videos and leverage a variety of drawing and annotation tools to make your lectures come alive. You don’t need a traditional interactive whiteboard anymore.

Before IPad, I used a wacom (a drawing pad connected to the PPT) since 2008, and one of my sharing can be read here.

I started looking for other alternatives through the IPad. From the first launched in early 2010, I believe that IPad will be a very useful tool for the completeness of my teaching in the classroom.

Let’s see the IPad role in my class, among others:

1. The virtual whiteboard.

2. Presentations that have been made previously in Keynote / PPT / Sway / Video.

3. Live presentation screen recording.

4. Post the presentation directly in to the virtual classroom / online, Schoology based.

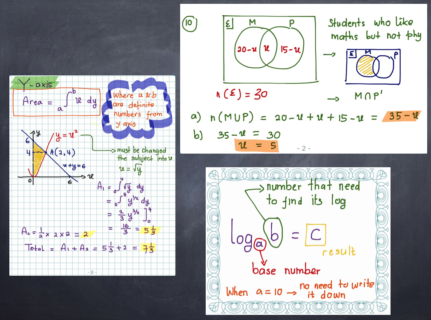
5. Browsing certain websites during the lesson. For me, there are some difficult things to explain through presentations that have been made in advance and presented by PPT. Sometimes I need to do in the same time, both explaining and writing. In this case, the IPad, the virtual whiteboard, solved my problems.

How is the workflows of the use of IPad and to connect it to the classroom projector? Check it out here:

1. Install Penultimate.

2. Install Explain Everything.

3. Install Schoology.

4. Internet / wifi connection in the classroom.

5. When I need a virtual whiteboard during my explanation, I open Penultimate. If I want to show images (from my files or from internet), I can easily insert it into my whiteboard screen.

6. If I want to explain with the help of software such as GeoGebra / desmos calculator, I also can easily replace the display board into browsing screen to access the website.

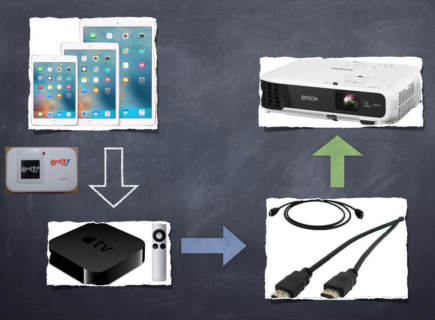
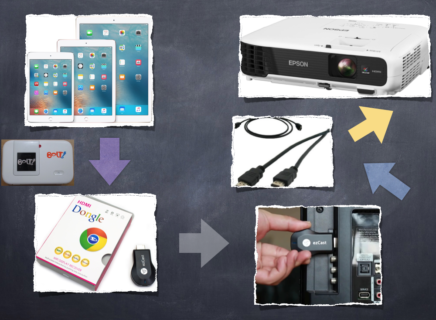
7. To display the virtual whiteboard on a projector screen, can be helped by these ways:

a. VGA cable connection with IPad to the projector.

b. If no cable like above, and your desktop is iMac or MacBook (desktop connected to the projector), IPad screen first transferred via USB cable connection to the iMac or MacBook use Quick Time Player Recording, and then to the projector (By doing this, I can easily record my screen presentation).

c. Use Apple TV: wireless, your mobile virtual whiteboard.

8. To create screencast lesson video, I use “Explain Everything”. This method used for the purpose of my blended learning / my flipped mastery classroom.

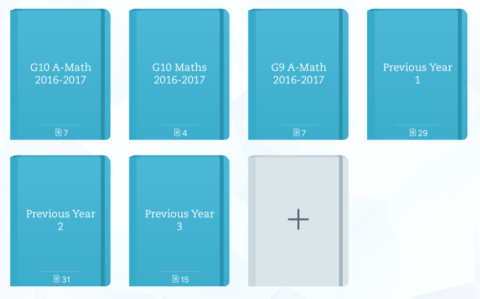
9. And, to store all those materials or classroom’s archive with students, I use online class, LMS, Schoology. Students can easily reach out the materials / teaching materials, anywhere, anytime. And they are also assessed by various formative tests in Schoology.

Some pictures to describe the connection:

screen-shot-2016-09-27-at-10-46-47-am screen-shot-2016-09-27-at-10-47-05-am screen-shot-2016-09-27-at-10-47-36-am screen-shot-2016-09-27-at-10-47-57-am

Teaching – Learning Media

A Post from May 2012

Friday, May 11th, 2012…..
One of the most memorable day of my life.
On that day, together with my students, we started our first class with iPad.

iPad is one amazing technology development, and I have this “advantage” of not  much into games so I can “play” with it to explore how to use it in my class.

I felt, ever since it was launched several years ago, iPad was mostly considered as a portable game center or sophisticated personal library of emails, photos and video. Even, parents tend to proudly show it off how their toddlers play with iPad.
Fortunately lots of people can see beyond the games and actually use it for learning, especially in the classroom.
You can click http://www.ipadsforeducation.vic.edu.au/ipad-in-the-classroom.

Especially after the launch of iPad2, and Apple cleverly updated the features on iPad with this amazing “video mirroring” to make it easier for teachers to use their materials, and application to the class.

Suddenly, iPad with its multi touch surface is becoming so accessible to the whole class if you need that too.
Click on the following link to learn about 5 advantage of iPad2 http://edreach.us/2011/03/13/5-reasons-why-i-want-ipad-2-in-my-classroom/.

When i used it in the classroom, it’s easy to see how helpfull iPad can be to show various applications, graphics, photos and of course my own virtual class. With iPad, it was like you have an advanced version of interactive whiteboard, while at the same time a direct access to your own materials. Of course, all works wirelessly.

I’ve been annotating my own Powerpoint presentation and PDF for years, but with iPad, i can annotate it and immediately safe it online from the same device, so the students can reread it.

The newer part is the content creation ability. With iPad, you can create videos, drawing, diagrams and easily share it as well.

It was exactly what I did that Friday, as I also recorded my class and then edit the video on the iPad.
You can see in the video, sometimes student eyes glued on the screen and it is a clue on how the right medium can actually help students focus.
Click on my link Last day in 2011 – 2012 with my students

I’ve been recording instructional videos since the last two years, but iPad also make it way easier to record the students as well if i want to add their response or answers, and I can do it directly in the classroom.

Before I even brought it into  teaching and learning process, I’ve known how powerful iPad can be.
But to actually use it make me realize how iPad can complete the cycle of material creations, delivery, exercise/quiz, assessment, feedback and interaction that I’ve done for the last two years. That, and you can never underestimate wireless portability 🙂

For me, that Friday really serve as a stepping stone to really educate and prepare my students for their digital future…

Jumat, 11 May 2012, saya rasakan sebagai salah satu hari yang paling berkesan dalam hidup saya.

Bersama dengan murid-murid saya, kami memulai untuk pertama kali (kebetulan bagi mereka menjadi yang terakhir kali bersama saya karena hari itu merupakan hari terakhir mereka di kelas 9), pengajaran di dalam kelas menggunakan iPad.

iPad merupakan salah satu kecanggihan teknologi yang sangat mengagumkan. Keuntungan saya tidak suka berkutat dengan games, malah menjadikan perangkat iPad sebagai salah satu media melakukan teaching learning di dalam kelas.

Klik link berikut ini untuk melihat bahwa iPad sudah menjadi bagian umum dalam ranah pendidikan http://www.ipadsforeducation.vic.edu.au/ipad-in-the-classroom

Lalu seperti biasa kecanggihan apple mengeluarkan update berkalanya, demikian juga dengan iPad 2. Kecanggihan yang ditawarkanpun meningkat seperti disebut di atas “video mirroring”. Presentasi menjadi bertambah kaya ragam, profesi guru yang identik dengan mempresentasikan bahan ajar menjadi sangat terbantu dengan kualitas iPad 2 ini.

Karena iPad 2 memiliki salah satu fasilitas yang menakjubkan yaitu “video mirroring” maka iPad 2 sangat berguna untuk pembelajaran di dalam kelas. Sebagai guru dapat menghadirkan software-software pembelajaran dari aplikasi pendidikannya pada saat mengajar kepada seluruh siswanya di kelas.
Klik link berikut untuk mengetahui 5 keunggulan iPad 2.
http://edreach.us/2011/03/13/5-reasons-why-i-want-ipad-2-in-my-classroom/

Saya merasa, bahwa saat keluarnya iPad beberapa tahun lalu, mayoritas orang menganggap bahwa iPad sebagai salah satu tablet canggih untuk memiliki perpustakaan pribadi, email, penyimpan data pribadi (foto dan video). Kadang banyak orang tua “bangga” dengan “anak usia balitanya adalah pengguna iPad”.

Ketika saya menggunakan iPad untuk proses belajar mengajar di kelas, sangat mudah untuk melihat bahwa iPad sangat berguna sebagai bagian media presentasi kepada siswa, macam-macam aplikasi, grafik, foto dan tentu saja kelas virtual saya. Seperti merasakan versi pengembangan dari interactive whiteboard dengan waktu yang bersamaan dapat mengakses langsung ke material milik kita sendiri. Dan yang pasti, semua secara wireless.

Sayapun sudah pernah mencoba menggunakan anotasi pada PPT dan PDF untuk beberapa tahun terakhir. Tetapi dengan iPad, hasil anotasi tadi dapat langsung disimpan secara online untuk diakses kembali oleh siswa di mana saja.

Video yang saya persembahkan untuk siswa saya di akhir masa belajarnya bersama saya, merupakan sisi lain dari penggunaan iPad, kami menikmati moment di mana siswa melihat dirinya sendiri di layar projector dan kami berkesan pesan dalam video tersebut.
Klik link saya di Last day in 2011 – 2012 with my students untuk melihat kami memasuki era baru belajar dengan iPad 2 di dalam kelas.

Saya telah membuat video pembelajaran sejak dua tahun terakhir ini, iPad membuat segalanya menjadi lebih mudah.
Salah satunya saya bahkan dapat membuatnya langsung dari dalam kelas.

iPad dapat melengkapi siklus pembelajaran saya mulai dari berkreasi akan materi ajar, menyampaikan ilmunya,
memberikan latihan/PR/quiz bahkan tugas-tugas lain, feedback, interaksi dengan siswa selain di dalam kelas, selama dua tahun terakhir ini. Perkembangan siklus ini saya harap semakin besar, sejalan dengan proses saya belajar dan belajar.

Bagi saya, hari Jumat itu sungguh merupakan sebuah batu loncatan untuk mengajar, membimbing dan mempersiapkan siswa siswa saya di dalam era digital yang telah mereka masuki untuk masa depan mereka…..
Collaboration using Google Docs – In Mathematics Class –

Collaboration can be defined as working practice whereby individuals work together to a common purpose to achieve goals. Students are invited and taught to have the ability to be helpful and make necessary compromises to accomplish a common goal.

This level of engagement that makes students feel like they’re together in the same room.

In my class, the goal of this activity is making my G9 students remember all the topics that we covered in class for two semesters. When they remember it, easier for them to recalling the problem and reconnect to the questions. Students need to prepare for their semester two final exam (paper based exam).

Below are the procedure of the activity:

  1. Listing the syllabus that had been covered for two semesters.
  2. I summarise in a document (in google docs).
  3. Share the document to students. All students have the same access to edit the document, except to change access and adding new people.
  4. In class – 2 hours lesson, they must post questions per outcomes from syllabus and answer their friends posting. They can create their own questions, take from text book or past paper, insert pictures, browsing from internet. I check each question and put comments to state correct or wrong questions or answers that they have posted. When they find it wrong, they will fix it and after that click on “marked as resolved”.
  5. Students can continue add questions or answer it at home. They are given 24 hours to complete it.
  6. This activity graded as an individual assessment, with the criteria (Rubric) as follows:
    • Number of questions posted in the document.
    • Number of questions that is answered.
    • Complexity of the questions.
    • Use of g(Math) add-ons to present equations / expressions / functions in document.
  7. Marking given when I trace the revision history in the document.


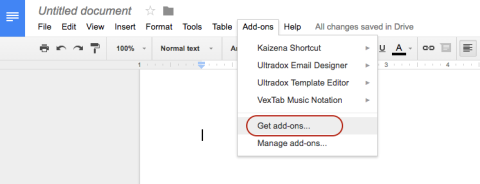
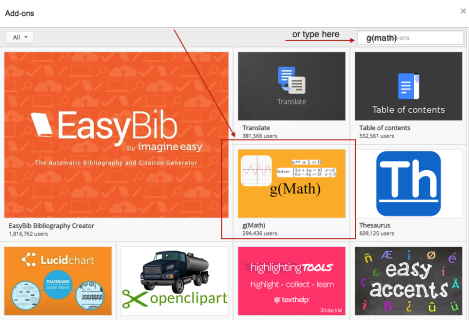
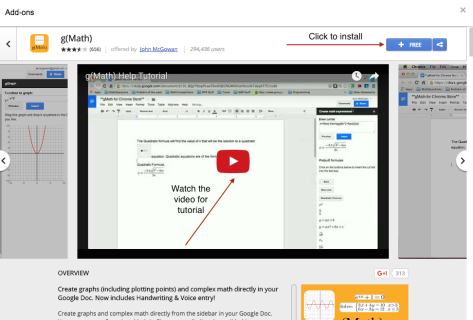
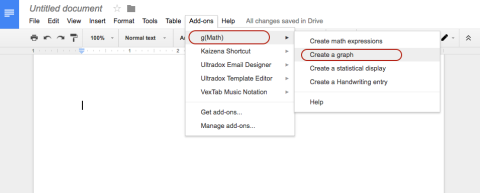
As a basic knowledge, students must install g(Math) add-ons in their own shared document. Below are the instructions:

In the document: 

Screen Shot 2016-05-24 at 9.30.53 AM

Screen Shot 2016-05-24 at 9.31.17 AM


Watch the video tutorial when needed, then install it.

Screen Shot 2016-05-24 at 9.31.48 AM


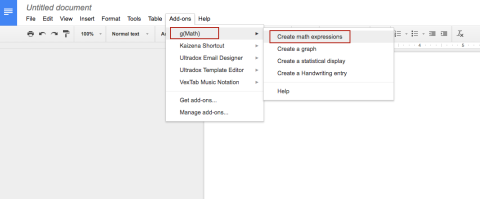
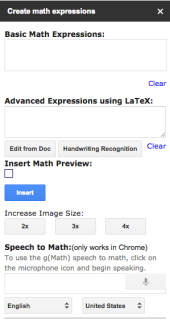
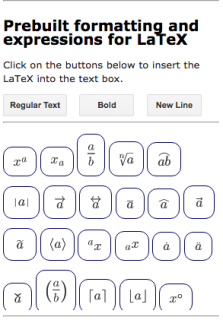
After installing g(math), you can create math expressions:

Screen Shot 2016-05-24 at 8.51.02 AM

Screen Shot 2016-05-24 at 8.52.11 AM     Screen Shot 2016-05-24 at 8.52.53 AM

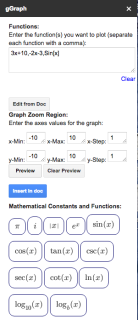
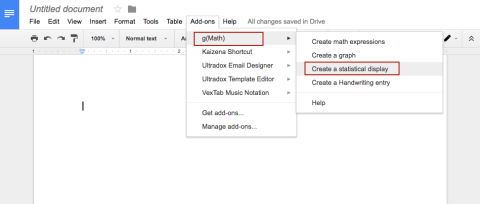
Create a graph:

Screen Shot 2016-05-24 at 9.05.06 AMScreen Shot 2016-05-24 at 8.58.46 AM


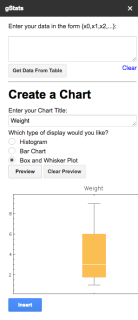
Create a statistical display:

Screen Shot 2016-05-24 at 9.05.18 AM

Screen Shot 2016-05-24 at 9.00.36 AM


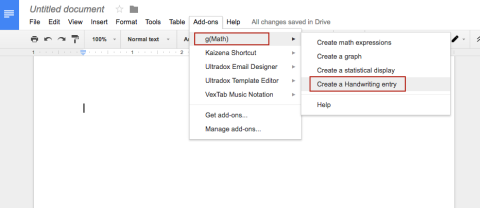
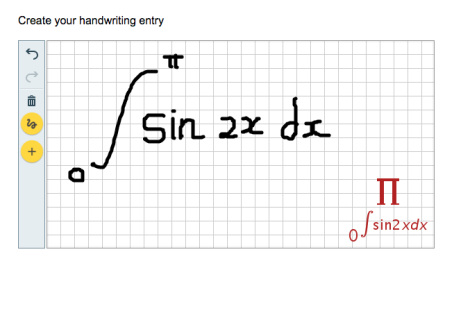
Create a handwriting entry:

Screen Shot 2016-05-24 at 9.05.27 AM

Screen Shot 2016-05-24 at 9.04.44 AM

You can use another add-ons, Kaizena to add voice comments to students. While we can also use g(Math) with Google Forms to create online math quizzes and tests.  Both tutorials will be given later 🙂

So, this is one example of teaching learning activities in class, especially in revision week before exam. We can create more activities engage them to be active learner. By doing this, at the end of this activity, I received a bunch of questions, and for them, suddenly, they have their own question banks (with answers) in cloud.

The following video recorded during the collaboration in class:

snowflake snowflake snowflake snowflake snowflake snowflake snowflake snowflake